Today’s article will provide you with some useful tips if you’re issuing receipts with Elementary POS. These tips will ensure you can save a lot of time and use your cash register in the simplest way possible. We are adding pictures for easier orientation.
1) Syncing receipts to Excel
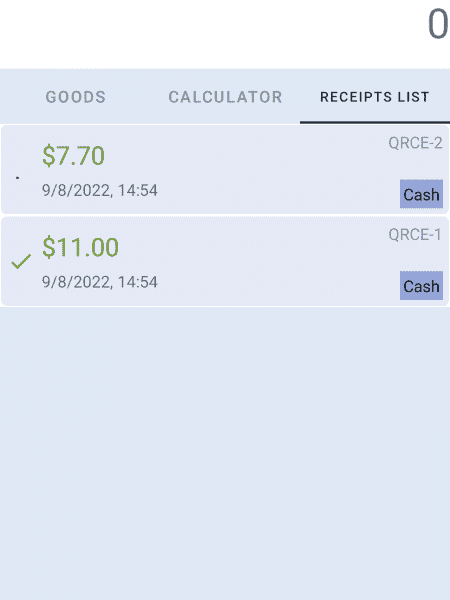
All receipts that you issue will sync automatically to the Back Office. From there, you can export them to an Excel report at any time. However, as you may have figured, the sync can only be performed while you’re online. If you have no Internet connection, your receipts will appear as “pending” until you connect. After that, they will sync automatically.
Keep in mind that if your employees are running the app on their individual devices, they have to connect to the Internet to be able to successfully end their shift. Without Internet connection, the data collected during their shift cannot be synced and thus, the shift cannot be ended.
2) Negative receipts / Cancel receipt
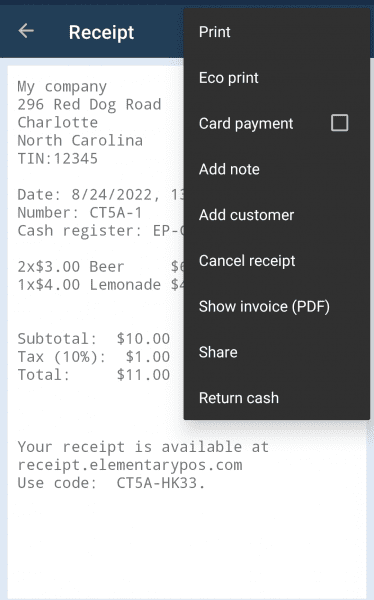
If you misclicked and issued a wrong receipt, you might want to cancel it. However, this can only be done with the last receipt you issued. The moment you issue another one, the previous receipt cannot be canceled anymore. Instead, you can issue a “Negative receipt”; one that has the wrongly issued amount, but in negative numbers. That will balance out your cash flow.
Negative receipts can also be used when a customer returns goods to you or wants a refund.
3) Add customer
Depending on your local laws, you might be required to add the name of your customer on the receipt, if they made a purchase above a certain amount. You can easily do this by tapping on Add customer in the top left drop-down menu, while you’re editing the receipt.
4) Note on receipts
Just like in the previous step, you can add a custom note to your receipt by tapping the top right icon while editing your receipt.
5) Adding items to your receipts
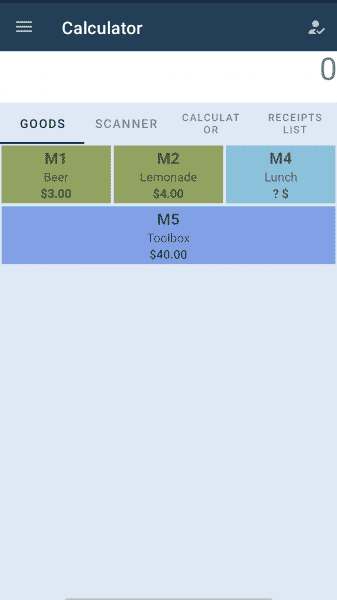
As you set up your sales items, you can save them under specific codes which can be entered upon creating receipts for a faster result. Just like this, if you’re working in the Calculator menu, you’re able to quickly enter custom commands such as “6M3” for 6 lemonades or “2M12” for two lunch offers.
These commands can be combined similarly to a regular calculator by separating them with “+”.
If you prefer to not work in the Calculator menu and rather straight tap on the ordered items from the list, you can tap and hold an item to quickly enter a specific amount of them.
6) Cash / Card payment buttons
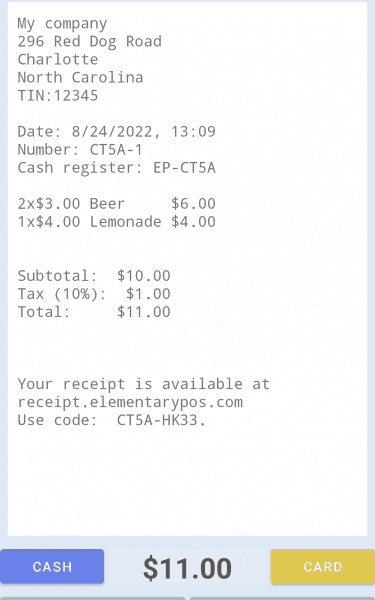
After you entered all necessary data, you are able to easily choose the payment method by tapping the corresponding button on the bottom of the screen.
7) Splitting the bill
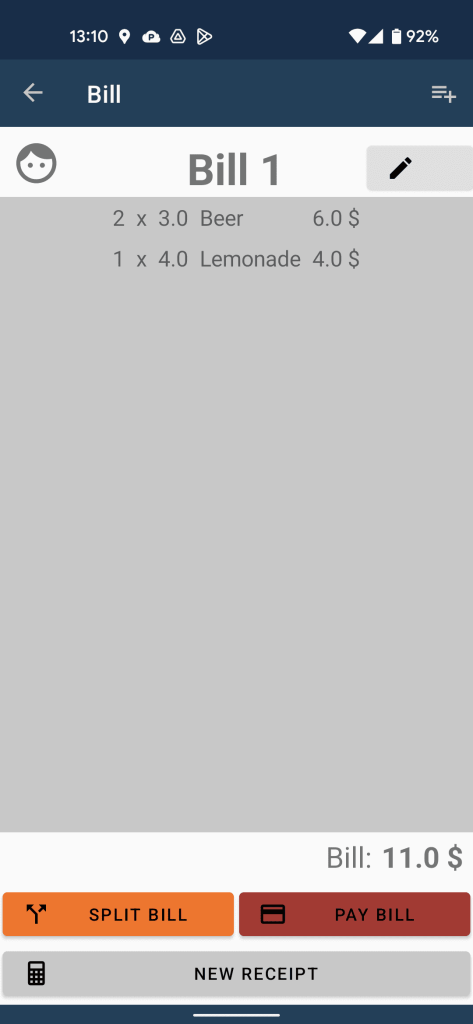
If you need to split the bill at any time, you are able to easily do so using our POS system. All you need is to tap the “To Bill” option top right, and then go to “Open New Bill”. From there, you can continue to either “Split Bill” or “Pay Bill”.
8) Temporary vs. Permanent bill
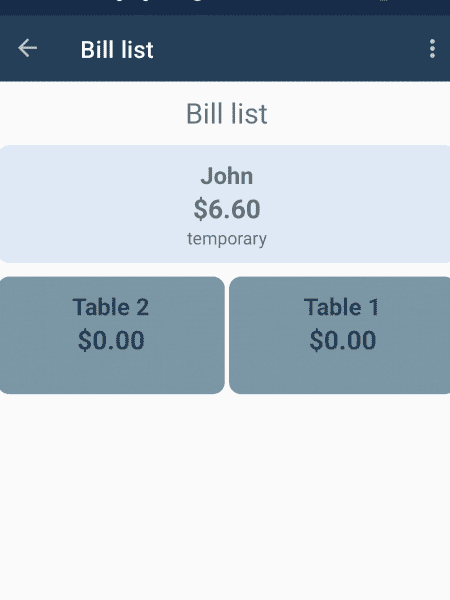
In the selection of bills, the temporary ones are always shown in the top part, while the permanent ones are at the bottom. Permanent bills come in handy if you own a café or a restaurant, where you have numbered tables and you just basically add/remove items from pre-made bills.
If you own a different type of business, such as an ice-cream stand or a take-away place, you are fine with the temporary bills.


