
A bank transfer payment option provides your customers with a choice between cash and non-cash payments, especially useful when a payment terminal is unavailable. In Elementary POS, you can enable payment through a bank transfer, allowing for quick payments directly to your account.
How to Activate a Bank Transfer Payment
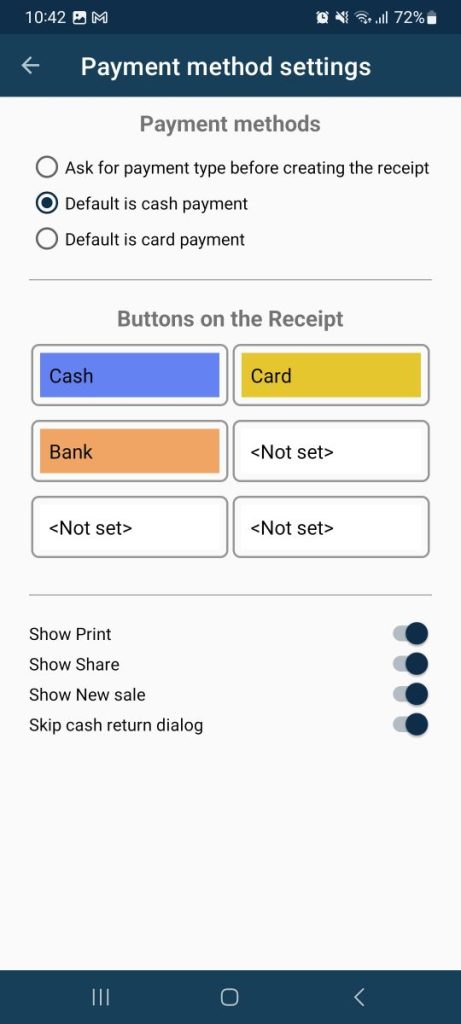
In the menu of the Elementary POS application, select Settings ➝ Payment Method Settings.
Here, in the Buttons on the Recept section, you can choose all payment methods that will be offered to you during checkout. You can therefore select the Bank option for bank transfer. You can also set which type of payment will be configured as the default:
This feature enables customers to choose between bank transfer and crypto payments, which can come in handy if they lack cash and you do not accept card payments.
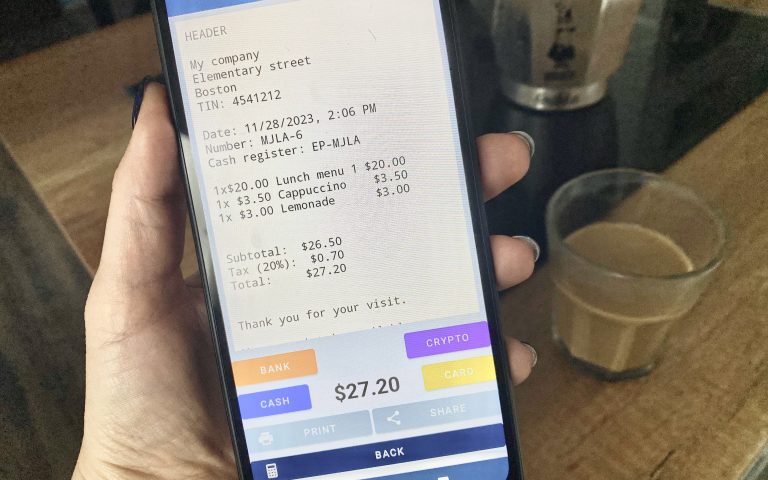
The Data on a Receipt
Enter details like bank account number and company name in the POS system settings to include them on receipts or PDF invoices.
Office settings: Menu ➝ Company Settings.
Saving with Bank Transfers
By entering a bank account number in the Elementary POS Office, the system generates a QR code for an instant payment. This QR code is displayed on PDF invoices, the customer display, and also on your cash register device if you double tap the “Bank” button.
Offering bank transfer payments provides an alternative to cash and non-cash payments and helps avoid high card payment fees.
TIP: When downloading reports to Excel from the Elementary POS Back Office, you can filter sales by payment method, making it easier to track customer preferences. If you use QR code payments, you can check how many customers per day use it!