If you’ve already tried working with the Back Office in Elementary POS, you may know that you can easily edit your Sales Items. However, if you need to make more changes at once, or even add multiple sales items, making these changes though Excel will be much faster and easier.
We always recommend working with the Office on your desktop rather than your smartphone, as the larger screen provides a lot more comfort.
Editing Sales Items Through Excel
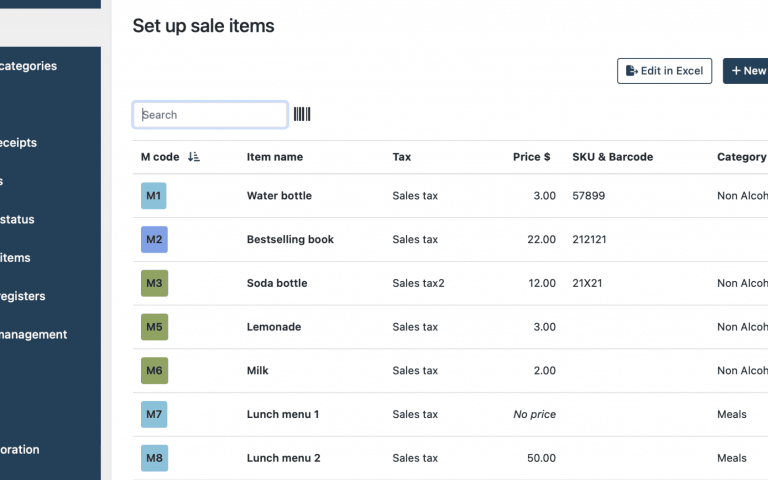
In the Elementary POS Back Office, choose Sales Items Settings and Items. On the top of your sales items list, you’ll see the “Edit in Excel” button.
1. Export to Excel
First, make your export. It downloads automatically and generates a file that you can open and directly edit in Excel.
2. Edit your items
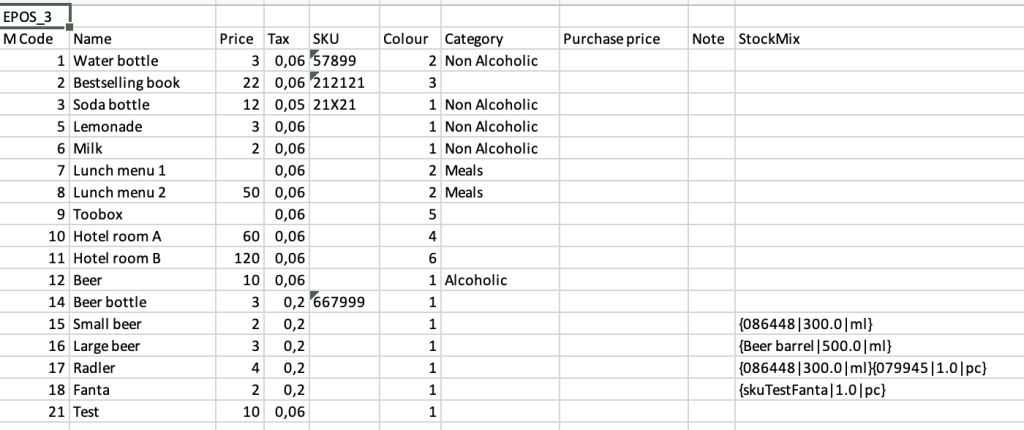
After opening your downloaded file, you’ll get an overview of your current sales items and their data.

You can even add a new sales item like this, or several of them at once.
M codes:
Assign them to your sales items to quickly enter the corresponding sales item on your receipt. For example, if the Soda bottle has the M code “3” assigned, all you need to place 5 Soda bottles on your receipt is to type 5xM3 on your Calculator in Elementary POS.
SKU codes:
This unique code consists of numbers and letters and enables you to register items to your stock, as well as to use a barcode scanner.
Color (category):
You can assign a color to each category of sales items (such as Soft drinks or Alcoholic drinks) to make searching for them easier. In our POS system, colors are marked with numbers. You can easily edit the colors (categories) of your sales items via Excel.
In the same way, you can set up or edit the sales/purchase prices of your items, as well as the tax.
Instead of editing each item separately in the Back Office, you can mass edit them through Excel and import all changes to your Back Office with a single click.
3. Import Back to the Back Office
After you’ve made all your edits, make sure you save the Excel sheet on your desktop. After that, you can tap on Import in the Office and after you select and upload the corresponding file, all the changes you have made will be immediately reflected to your Sales items in Elementary POS.
Keep in mind that in order to see these changes, you need to be online with both the Back Office and the Elementary POS app.


