Elementary POS includes many smart features that help you keep your business under control — and clear, well-structured product categories are one of the most important ones. If you work with dozens (or even hundreds) of items, good organization will significantly simplify daily operations for you and your team and speed up customer service.
Items can be easily sorted and filtered in sales reports. For each category, you can also define when it should be available at the register or for remote orders. This gives you full control over your menu — clear, fast, and without unnecessary complications.
How Do Categories Work in Elementary POS and Where Can You Set Them Up?
You can manage sales categories in the Elementary POS Back Office. In the menu, go to Sale Items Settings – Sales Categories. Click Create Category to open the category settings window.
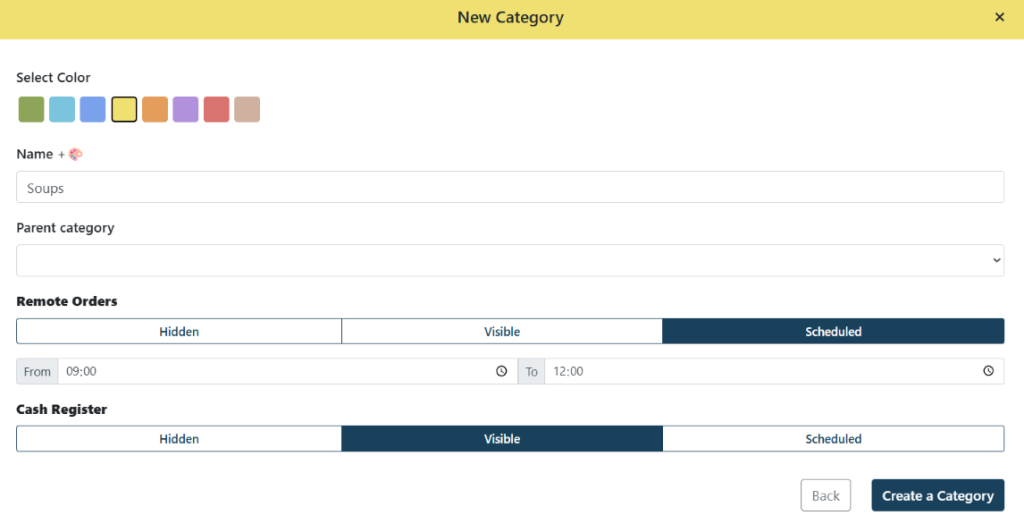
Category Settings
Each category can be assigned a custom name and a color label. This color is used to display items from that category in the app, helping staff quickly recognize them. For example, if the Salads category is green, it will be instantly recognizable at a glance. You can also add emojis to category names for easier orientation by clicking the color palette next to the category name.
For every category, you can define whether it is available for remote orders. You can also limit availability to specific time ranges — separately for in-store staff and for remote orders. This makes it easy to offer, for example, a Lunch Menu only during lunchtime hours.
Displaying Categories in the App
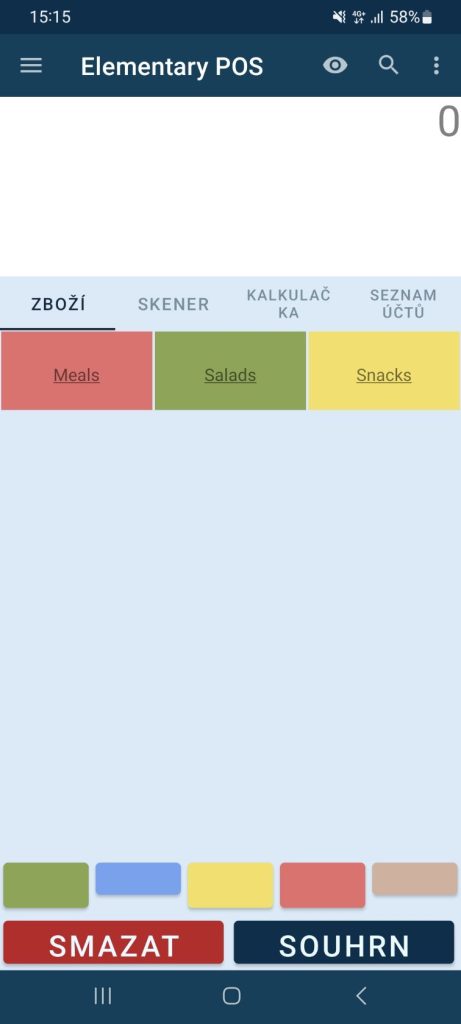
On the main screen of the Elementary POS app, you will see all available categories. When you open a category, you will see any subcategories and individual items. If an item is not assigned to any category, it will appear directly on the main screen.
At the bottom of the app screen, you can enable color-based filtering. This allows you to display only selected categories. This is especially useful when part of your staff handles drink and bar orders, while another part focuses on food and kitchen orders.
Structuring Categories
You can create and organize categories exactly according to your needs. Categories can also be nested, allowing you to create subcategories.
To reorder categories, click and hold a category with your mouse and drag it to the desired position. If you move it under another category, it becomes a subcategory. The category order in the Elementary POS Back Office is reflected directly in the POS app and in the remote ordering system.

Practical Example: How to Structure Drinks
If you run a bar with a wide beverage selection, you could structure your menu like this:
- Create a main category called Drinks in the Elementary POS Back Office.
- Create subcategories Alcoholic and Non-Alcoholic, then drag them under Drinks.
- If your menu is large, you can add another level — for example Hot and Cold under Non-Alcoholic. Under Hot, you could include teas and different types of coffee.Under Cold, you could list juices, water, soft drinks, and more.
- Use modifiers. For lemonades or coffee, you can set up flavor options or other variations.
How to Assign an Existing Item to a Sales Category
Go to Sales Items Settings – Sales Items and open the item you want to edit. A settings window will appear where you can assign the item to a category using the Main Category dropdown field.
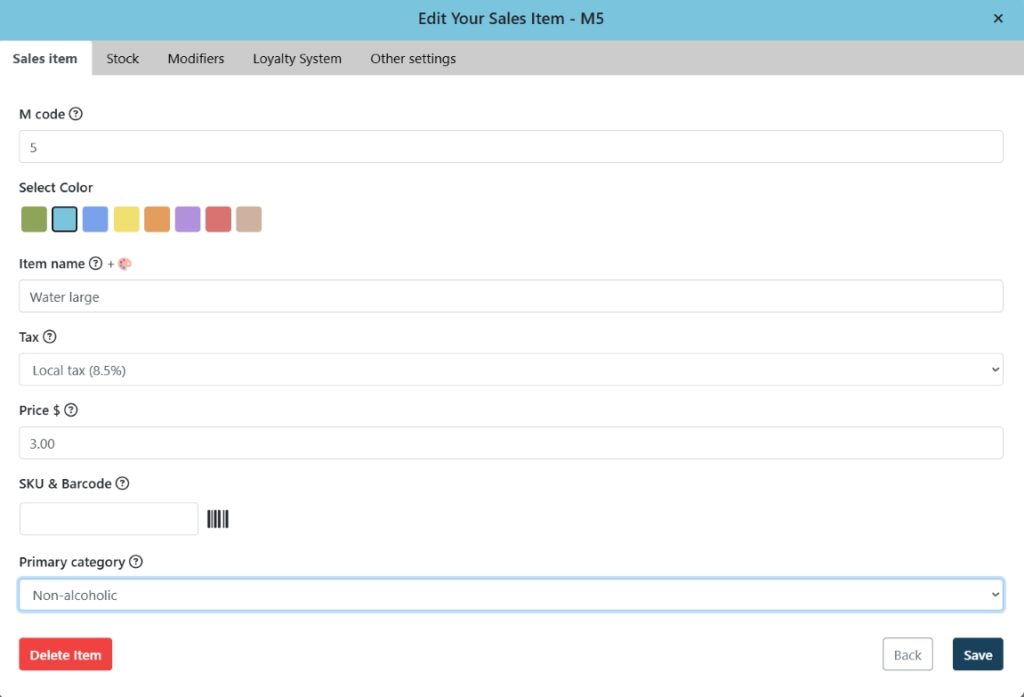
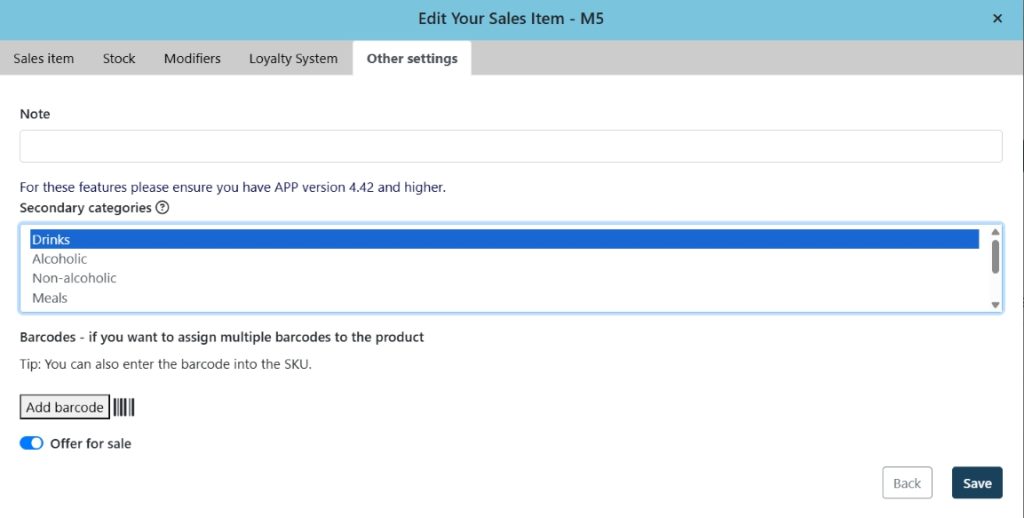
One sales item can belong to multiple categories at the same time. This is useful, for example, if you want the same dish to appear in both the lunch menu and the evening menu. To add a secondary category, open the Other Settings tab and select a category in the Secondary Category field. To select multiple secondary categories, hold CTRL while selecting.
Bulk Editing
If you manage a large number of items and categories, you can make changes in bulk.
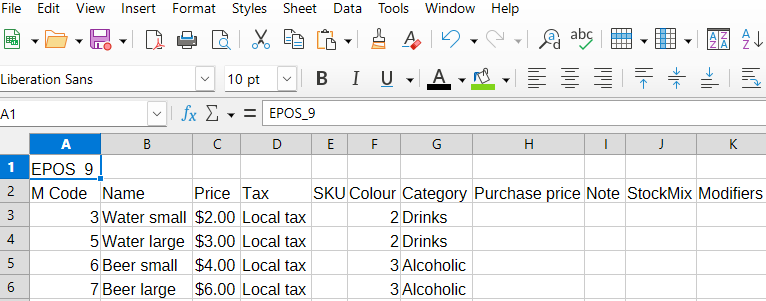
In the Elementary POS Back Office, go to Sales Items Settings – Sales Items. In the top-right corner, click Edit in Excel and choose Export. A file will be automatically downloaded, which you can open and edit in Excel (or LibreOffice).
The file contains separate tabs for Sales Items, Stock Items, and Categories. Each tab shows your current data, which you can modify as needed. You can also add new items or delete existing ones.
After making your changes, save the file. Then return to the Elementary POS Back Office, click Import, and upload the updated file. All changes to items, categories, and their settings will be applied instantly in Elementary POS.