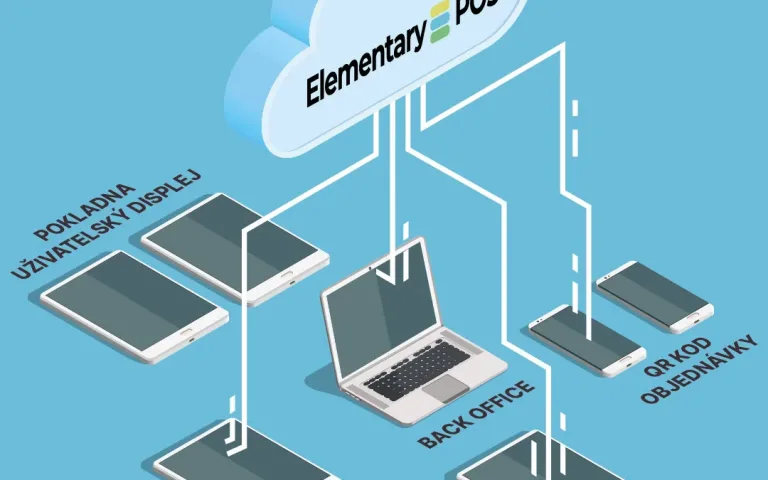
There are several ways to issue a receipt or an invoice with Elementary POS. An advantage that all these methods share is that you only need a mobile phone or a tablet to make them work!
- Select from the Sales item list
- Use a Barcode Scanner
- Select Sales Items using the Calculator
You can also combine these methods, e.g. by scanning various items and adding the rest manually using the Calculator.
In-App Sales Item List
This is the simplest method for adding sales item to the receipt.
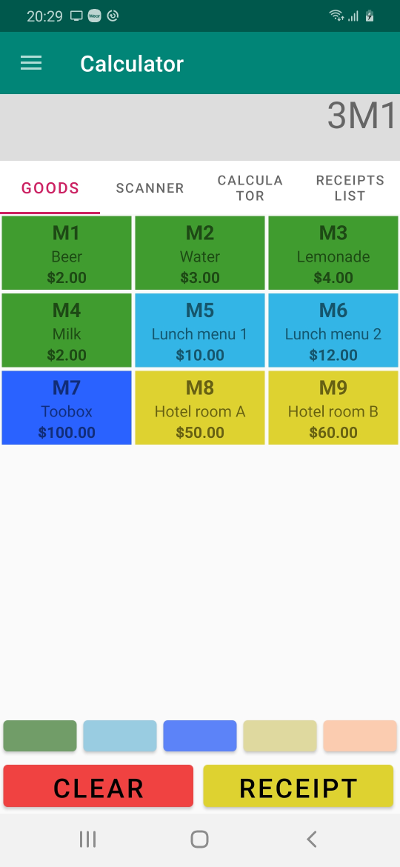
All the sales items you have set up will appear in the Elementary POS app. Every time you tap on an item, one singular unit will be added to the customer’s receipt. If you have a lot of sales items, we recommend setting up Item Categories or Colors in the Elementary POS Office. That way, you can filter them by a Color or a Category while working with your cash register.
Barcode Scanner
There is a barcode scanner feature directly in the app, which will use the camera of your device. The barcode scanner helps you work faster by finding a sales item in the blink of an eye.
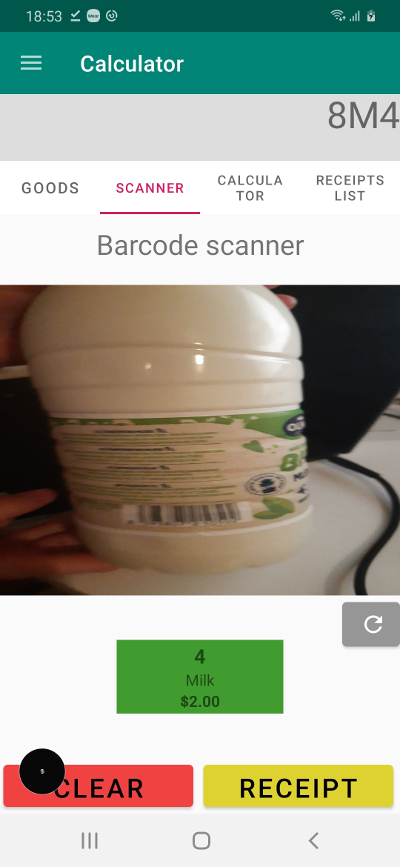
Point your camera at the barcode of the sales item. When the barcode is detected, you’ll hear a “beep”. By tapping several times on the sales item, you can edit the quantity. To undo an action, tap on “BACK” and the last sales item will be removed.
You can also connect an external barcode scanner to Elementary POS and set it up easily following the in-app instructions!
Here’s more about how to use a barcode scanner in Elementary POS.
Calculator
The Calculator is the most versatile tool for creating receipts.
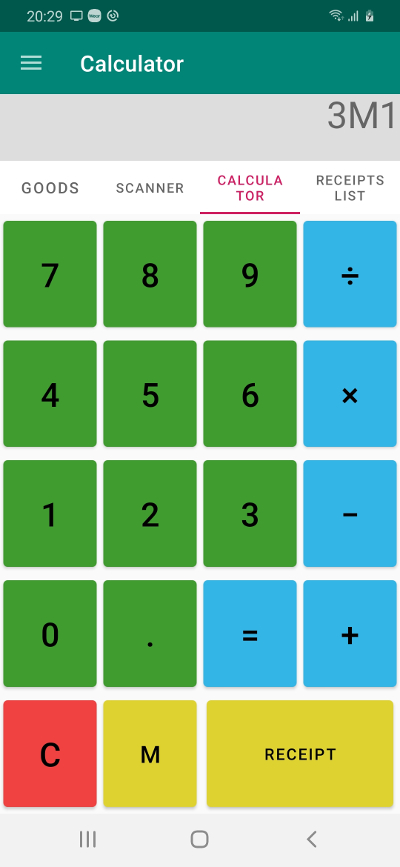
The calculator can be used even if you have no pre-set Sales Items. In this case, you just enter the price and tap on “Receipt”. In the next step, you’ll asked to enter the tax and you can also optionally edit the name of the sales item.
If you have your Sales Items set up and are familiar with M codes, you can use them right now.
If you haven’t read about M codes yet, it is very simple. An M code is a simple identifier that you can assign to each of your Sales Items. For example:
- M1 Beer
- M2 Water
- M3 Lemonade
- M4 Wire (1 meter)
- M5 Lunch Menu (no specified price)
Having this set up, you can enter the following short cuts in the Calculator:
- Two Beers and a Lemonade: 2xM1+1xM3
- Three Beers, a Water and a Lemonade: 3M1+M2+M3
- 10.5 meters of Wire: 10.5M4
- Lunch Menu with the price 10 USD: 10M5
- Lunch Menu for 10 USD, Lunch Menu for 15 USD and two Lemonades: 10M5+15M5+2M3
Tip: If you do not remember the M code, double tap the M button!
You can switch to the Sales Items list or to the Barcode Scanner at any time.
Receipt Summary Screen
After tapping on “Receipt”, it’s time for one final check. If you need to, you can change the quantity of the sales items by tapping on the top right option. Or, you can return to the Calculator by tapping the arrow top left. If everything’s fine, tap on “CREATE RECEIPT”.

Customizing the Receipt
When the receipt or invoice is created, you can modify it. Open the top right menu:
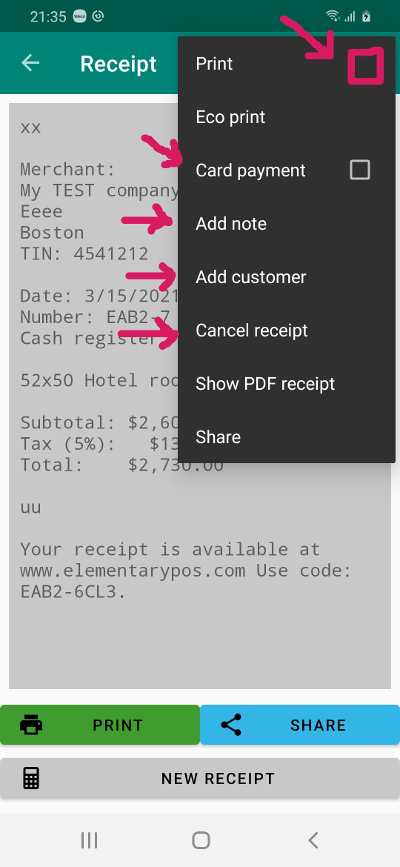
You have the following options:
- Card payment. You can mark the receipt as a card payment. Receipts paid by card can be filtered in Excel reports.
- Add note. You can add an optional note to the receipt. The note will be printed on the receipt, and it’s visible in Excel reports.
- Add customer. You can add customer details to the receipt. In some cases this is mandatory to create a valid invoice. It may depend on the total price of the purchase, or on your local legislation. The customer details will appear printed on the receipt.
- Cancel receipt. If needed, you can cancel a receipt. There are two ways to do it:
- Delete a receipt – Only a user with the admin role can do this, and only with the last receipt that was created.
- Create a new negative receipt – The total sum of these two receipts will be zero.