Make your life easier with the POS barcode scanner. You do not have to search sales items manually. Just point your camera at the barcode and the sales item is selected automatically. Nowadays almost all mobile devices or tablets have a camera. Let’s use it as a handy mobile barcode scanner.
Basic setup of the barcode scanner
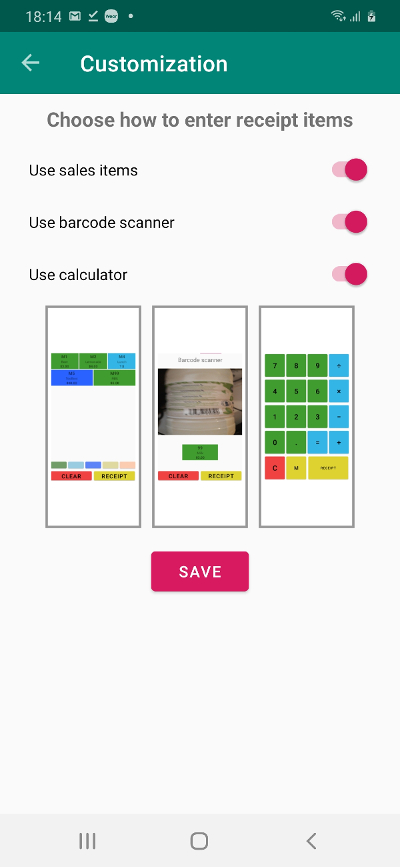
To setup the barcode scanner in the Elementary POS APP go to the application settings:
- Open Elementary POS APP.
- Open drawer menu (top left corner).
- “Settings”.
- “Customization”.
- Check “Use barcode scanner”.
- Press “Save” button.
- The APP will ask you for the camera permission. Please allow all.

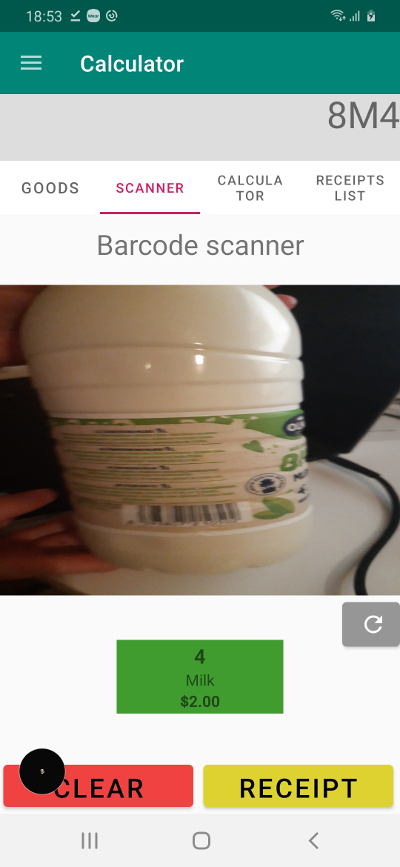
After successful setup there will be four tabs in the main APP screen:
- Goods – The list of all sales items. You can filter items by the color.
- Scanner – Barcode scanner – recently enabled.
- Calculator – Quick and easy way to select sales items with the calculator.
- Receipts list – Complete receipt list.
Assign the sales item to the barcode
Now we have to assign the barcode to the sales item:
- Open Elementary POS APP.
- Open drawer menu (top left corner).
- “Settings”.
- “Company settings”.
- “Sales items”.
- Select sales item you want to modify. Or create a new one.
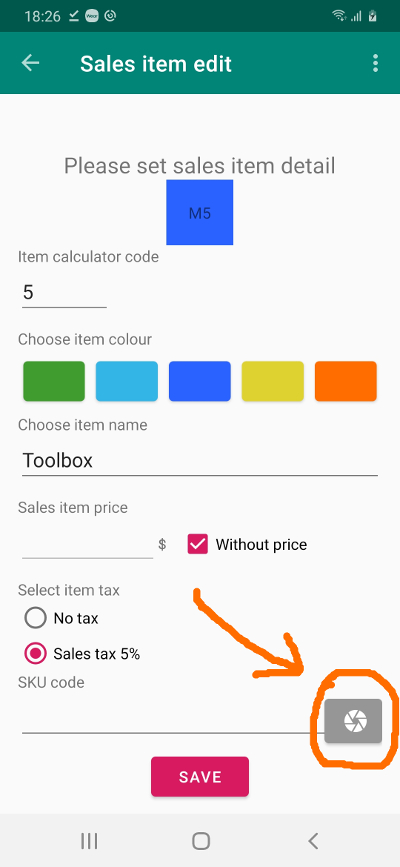
- Find Edit Box for SKU code and press “Camera” button.
- Assign barcode value to your sales item.
- Press “Save” button.

Scanning the barcode
Go to “SCANNER” tab. Point your camera at the barcode. When the sales item is recognized, the name of the sales item appears below the camera view. If you want to increase the amount, simply press the button several times. Or swipe to the “CALCULATOR” tab. On the “CALCULATOR” tab you can multiply the price with the specific amount. If you have any problem with the camera, please restart it with the grey button on the right side of the screen.


